Case Notes are not required to be recorded in HMIS, however, this article is intended for those agencies and users who which to document case notes within the system.
NOTE: Case Notes within Case Plan Goals are not shared with other agencies, however, Client Notes (found on the Client Profile Tab) and Service Notes (found in Service Transactions) could be shared.
USE CAUTION WHEN ENTERING NOTES TO VERIFY YOU ARE ENTERING NOTES IN THE APPROPRITATE LOCATION
Creating an Initial Case Plan Notes
- Select Enter Data As provider
- Search for the client and select the record
- Set Back Date Mode
- Click on the Case Plans tab
- If this tab is not present on your screen, confirm Enter Data As is set. If EDA is set correctly but the tab is still not present, please reach out directly to NCCEH Data Center
- Click the Add Goal button
- If a household exists, select all family members to whom the goal will apply
- Select Provider by making a selection from the drop-down menu
- Type in the Date Goal was Set
- Set "Classification" to General Case Notes by clicking the drop-down menu
- Set "Type" to Case Notes by clicking the drop-down menu
- Set "Overall Status" to Identified
- Click the Add Goal button
- Add a Case Note
- Click the Add Case Note button
- Type the case note
- Click the Save Case Note button
- Click the Save & Exit button
Recording Ongoing Case Plan Notes
- Select Enter Data As provider
- Search for the client and select the record
- Set Back Date Mode
- Click on the Case Plans tab
- Click on the "notepad icon" on the same line as General Case Notes
- Click on the Add Case Note button
- If a household exists, select all family members which the case note will apply
- Select Provider by making a selection from the drop-down menu
- Type the case note
- Click the Save Case Note button
- Click the X at the top right corner to close the pop-up box
Printing Case Plan Notes
Starting within the Client's Record
- Click on the Case Plans tab
- Click on the
- Click on the "notepad icon" on the same line as General Case Notes goal
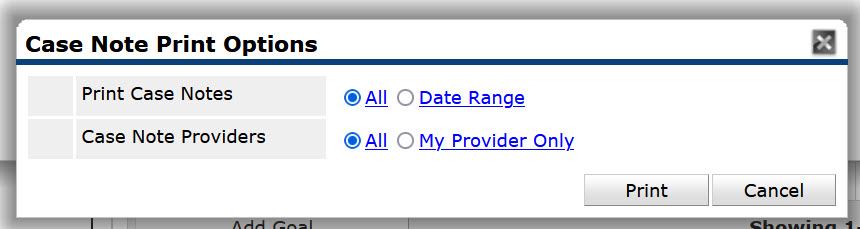
- Click Print
- Make a selection from Print Case Notes
- All: print all available case notes since the beginning of time
- Date Range: print all available case notes since the date range manually entered
- Make a selection from Case Note Providers
- All: print all available case notes from any provider within the agency's visibility
- My Provider Only: print all available case notes from just the provider with the set EDA mode
Comments