There are times when additional people may join a household currently being served by a residential project, such as when a baby is born. This tip sheet is designed to assist HMIS users with how to add additional household members to a household via the Household Tab followed by entering the new members to the project entry for which service is already in progress.
This tip sheet is specific for projects using ShelterPoint.
Adding a new client to a Household
- Select Enter Data As provider
- Click ShelterPoint
- Select correct Unit List and then click Submit
- Click View All
- Click on the Head of Household's name from the shelter bed list.
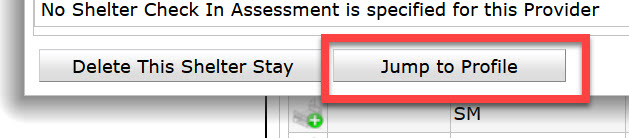
- From the Unit Stay pop up window, scroll to the bottom to click Jump to Profile
- Back Date Prompt: list the date the new household member joined and click Set New Back Date
- Click on the Households tab

If a household already exists:
- Click on Manage Household to edit the existing household

- Update the Household Type, if appropriate

- Click arrow in front of Previous Household Members
- If the individual is in the list, click the circular blue arrow in front of client’s name
- Fill in the date the client rejoined the household and the relationship
- If the individual is not in the list, click Add/Delete Household Members
- Click the arrow in front of Add Clients to the Household
- Fill in the individual’s name, then search
- If the client appears in the search results, click the green button to add them to the household
- If the client does not appear in the search results, fill in the additional information (name data quality, SSN, SSN data quality, and veteran status) and click Add new Client with this Information
- Repeat for each individual joining the household, then click continue.

- If the individual is in the list, click the circular blue arrow in front of client’s name
- Fill in the relationship to head of household for each household member

- After all Household Members are present and the "Household Type", "Relationship to Head of Household" and "Joined Household" fields are all confirmed, click Save & Exit
If there is no household on the household tab:
- Click Start New Household

- Answer the Household Type

- Fill in the new individual's name, name data quality, SSN, SSN data quality, and veteran status, then search.
- If the individual appears in the search results, click the green button to add them to the household
- If the client does not appear in the search results, click Add new Client with this Information
- Repeat for each individual joining the household, then click continue.

-
From the top table ("Household Members"), identify the Head of Household by selecting "Yes" from the Head of Household Column. Then fill in the relationship to head of household for each household member

- After all Household Members are present and the "Household Type", "Relationship to Head of Household" and "Joined Household" fields are all confirmed, click Save & Exit
Adding the new client to the existing Shelter Entry
- Click on ShelterPoint and click View All to see all clients entered into a shelter bed.
- Click on the Head of Household's name from the shelter bed list.
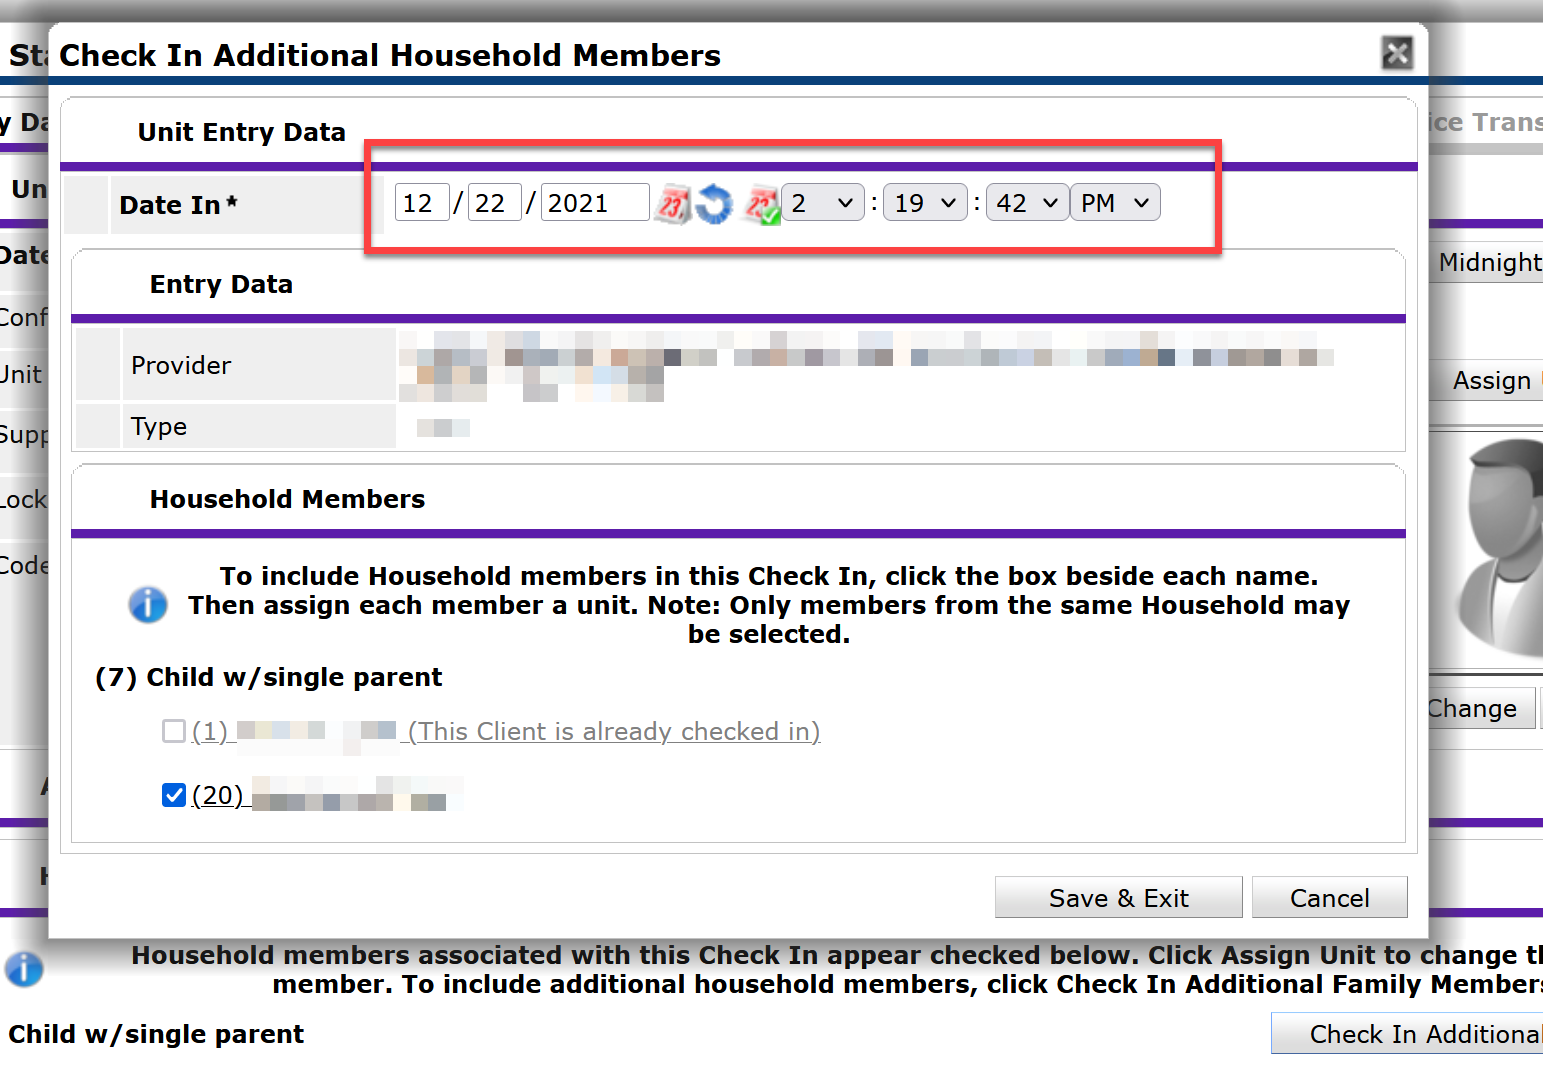
- From the pop-up box, scroll down to the Household Member's table and click Check In Additional Family Members.

- Type in the Date In field with the date the additional family member entered the project.
- If the family member entering is a newborn, the "Date In" cannot be the same date as the Date of Birth.
- If the family member entering is a newborn, the "Date In" cannot be the same date as the Date of Birth.
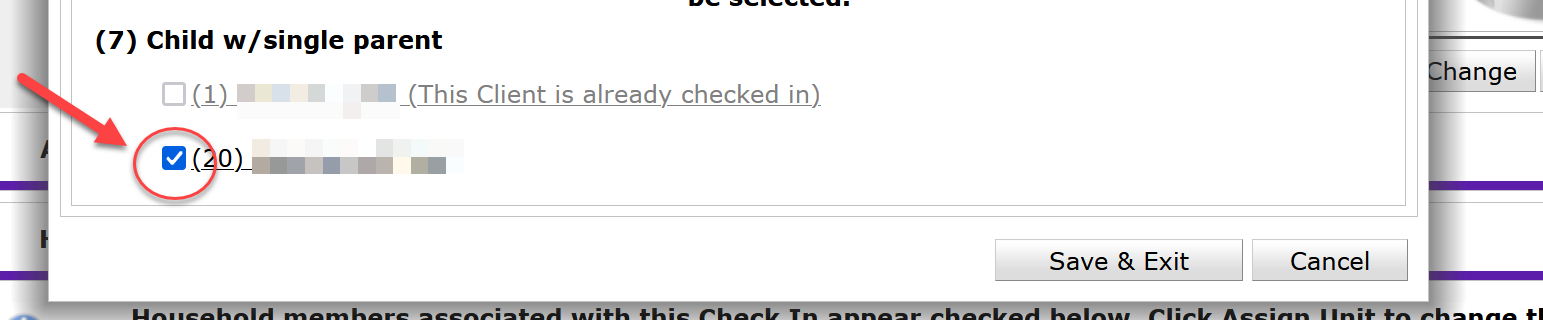
- Click the checkbox next to the family member's name that is joining the household in the project.
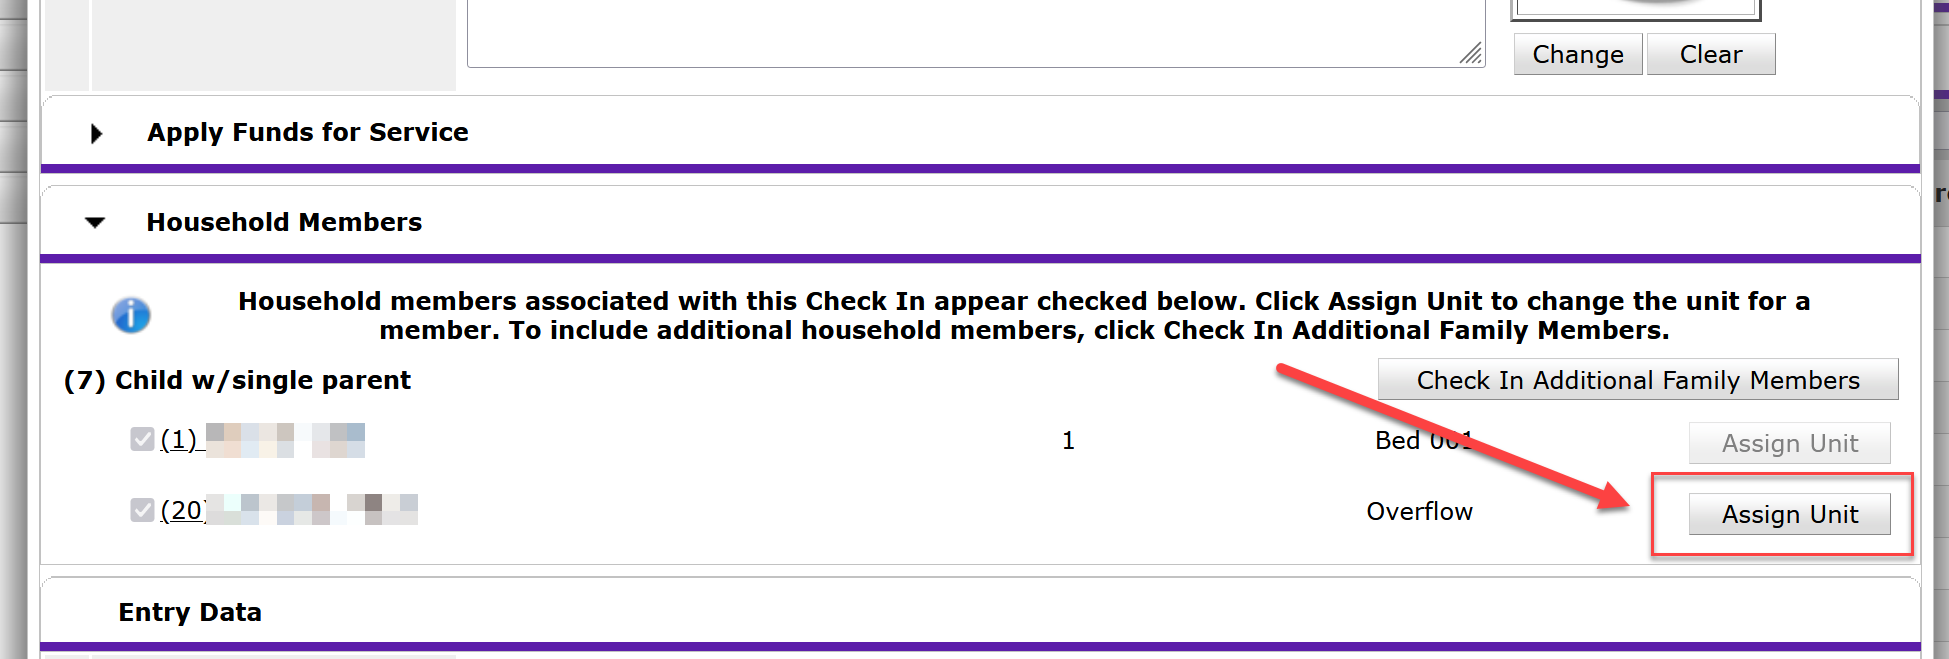
- If the additional family member needs to be assigned a specific bed, click assign unit and select a specific bed from the bed list and click select. Otherwise, the family member will be defaulted to an overflow bed.
- Click Save at the bottom of the screen.
- Scroll back to the top of the Shelter Stay Entry pop-up box and click on the Entry/Exit tab.
- Click the pencil for the entry to which you need to enter the additional family member's entry information.
- Click Save & Continue
- Click on the new client(s) name on the left-hand side and complete applicable assessment questions.
- Once all entry assessments have been completed for the newly joining client(s), click Save & Exit
Comments