Adding yourself as a case manager for a client in HMIS is not required but has many benefits. Other users in your agency can see that you are the assigned case manager for that client, and can see your contact information. You are also able to add counts reports to your home dashboard that quickly show you everyone on your caseload.
How to assign yourself as the case manager
1. In ClientPoint, search for and open the client's record
2. Go to the Case Managers tab
3. Click Add Case Manager
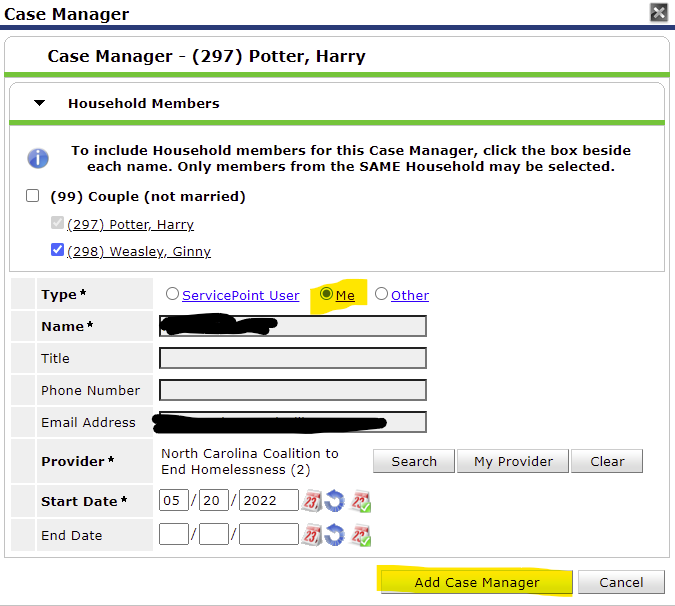
4. If you are adding yourself for multiple household members, click on the box next to each household member.
5. Click Me for the Type and your information will automatically populate. If you need to update the email and/or phone number associated with your license, follow these steps.
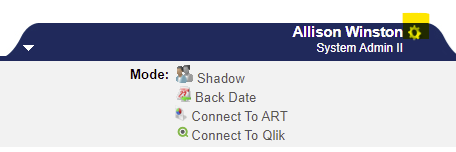
1. From your HMIS home dashboard, click the gear icon at the top right, next to your name.
2. A popup box will appear where you can change your email and/or phone number and click Save and Exit
6. Change the Start Date if necessary. Leave the End Date blank.
7. Click Add Case Manager.
How to remove yourself as a case manager in HMIS
1. In ClientPoint, search for and open the client's record
2. Go to the Case Managers tab
3. Click on the pencil icon to the left of your name and a box will pop up.
4. Add an End Date and click Save Case Manager
*Note you should remove yourself as the case manager by end-dating yourself, rather than deleting yourself from the case manager list. This way, there is a record showing from X date to X date, you were the case manager for that client.
Are you looking for more resources related to case management activities in HMIS? Check out these articles!
Creating and managing case plan goals
Comments